The old Singer sewing machine manual is a valuable resource for restoring and operating vintage models, offering detailed guidance on maintenance, troubleshooting, and advanced sewing techniques.
Importance of the Manual for Vintage Sewing Machines
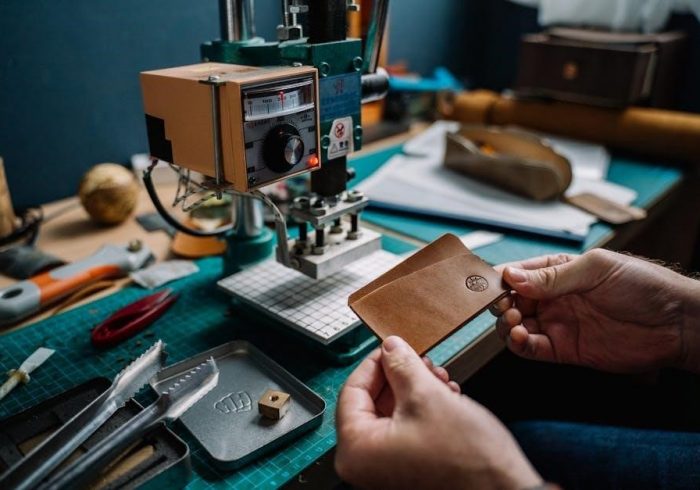
The old Singer sewing machine manual is an essential guide for enthusiasts and collectors of vintage sewing machines. It provides detailed instructions for proper operation, maintenance, and troubleshooting, ensuring the machine runs smoothly. The manual also includes diagrams and step-by-step processes for tasks like threading, bobbin management, and presser foot adjustments. For those restoring or repairing vintage Singer models, the manual serves as a vital resource, offering insights into original specifications and parts. Additionally, it highlights safety precautions and best practices, making it indispensable for both novice and experienced users. Its availability in PDF format ensures easy access and convenience for modern users. By following the manual, users can preserve the functionality and longevity of their vintage Singer sewing machines, while also unlocking their full creative potential.
Historical Context of Singer Sewing Machines
Singer sewing machines have a rich history dating back to the mid-19th century, revolutionizing the textile industry and home sewing. Founded by Isaac Singer, the company introduced the first practical sewing machine for domestic use, making it accessible to households worldwide. Singer’s innovations, such as the treadle-powered machine and later the electric model, set new standards in sewing technology. The company’s global expansion and production of user-friendly designs solidified its reputation as a leader in the industry. Over the years, Singer sewing machines became synonymous with durability and reliability, earning a loyal following among sewists. Today, vintage Singer models are highly sought after by collectors and enthusiasts, preserving a legacy of craftsmanship and innovation that shaped the evolution of sewing;
Understanding the Old Singer Sewing Machine Manual
The manual provides a comprehensive guide to operating, maintaining, and troubleshooting vintage Singer machines, ensuring users master sewing techniques and customize their work with ease and precision.
Structure and Content of the Manual
The old Singer sewing machine manual is structured to provide clear, step-by-step guidance for users. It begins with safety precautions, ensuring users understand proper handling and maintenance. The manual then details the machine’s principal parts, such as the tension dial, presser foot, and bobbin winder, with accompanying diagrams for easy identification. Additional sections cover accessories, like the snap-in sewing table and various presser feet, enhancing functionality. The guide also includes instructions for basic operations, such as threading the machine, winding bobbins, and adjusting stitch settings. Troubleshooting tips address common issues like thread tension problems or needle breakage. Maintenance advice, including cleaning and lubricating, is provided to extend the machine’s lifespan. The manual concludes with advanced techniques for sewing thick fabrics and customizing stitches. Its organized layout and detailed content make it an indispensable resource for both novice and experienced sewists.
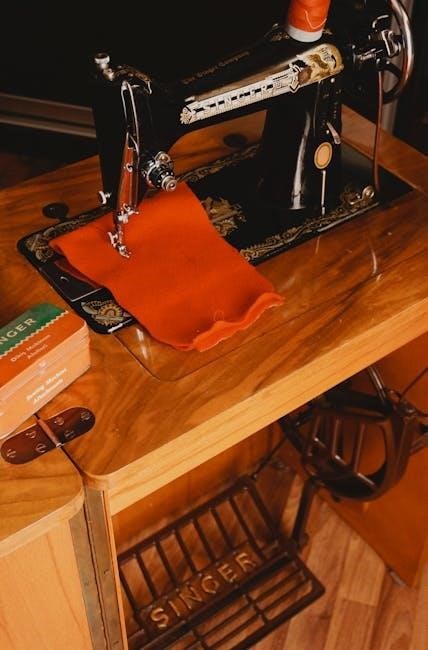
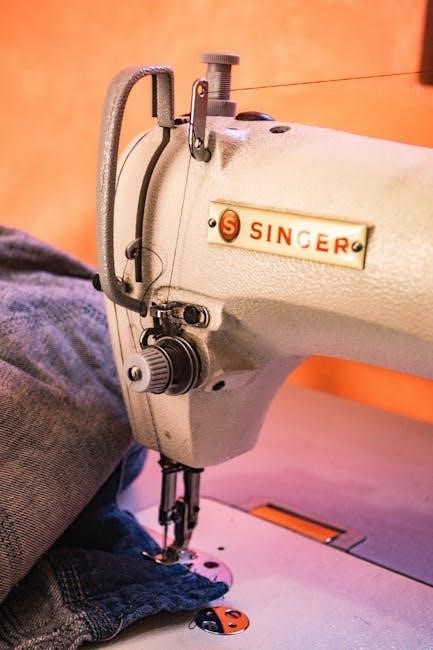
Key Components of the Singer Sewing Machine
The Singer sewing machine features several essential components that ensure smooth operation. The tension dial regulates thread tightness, while the presser foot holds fabric in place. The bobbin winder manages thread supply, and the spool pin secures the thread reel. The handwheel controls needle movement, and the power and light switch activates the machine and illuminates the work area. Additional components include the main plug socket, bobbin thread guide, and upper thread guide, which ensure proper thread flow. The face plate protects internal mechanisms, and the presser foot lever adjusts fabric pressure. Accessories like the all-purpose foot and zipper foot expand sewing capabilities. These components work together to deliver precise stitching and versatility for various sewing projects, making the Singer machine a reliable tool for both basic and advanced tasks.
Safety Instructions and Precautions
Using a Singer sewing machine requires adherence to essential safety guidelines to prevent accidents and ensure optimal performance. Always keep children away from the machine and avoid touching sharp parts like needles and pins. Use only genuine Singer needles, as incorrect ones can damage the machine or cause injury. Never pull fabric forcefully while sewing, as this may lead to needle breakage. Keep the work area clean and free from flammable materials. Switch off the machine when making adjustments, such as threading the needle or changing the presser foot. Avoid sewing loose clothing or long hair that could get entangled. Regularly inspect the power cord and plug for damage. Following these precautions ensures safe operation and prolongs the machine’s lifespan. Neglecting safety measures can result in machine damage or personal harm, so always prioritize caution when working with your Singer sewing machine.
Troubleshooting Common Issues
The manual helps identify and resolve issues like thread tension problems, jammed bobbins, and needle misalignment, ensuring smooth operation of your vintage Singer sewing machine with easy solutions.
Identifying Common Problems with Old Singer Machines
Old Singer sewing machines, while durable, can develop issues over time. Common problems include thread tension imbalances, jammed bobbins, and worn or misaligned needles. Users may also encounter mechanical noises, poor stitch quality, or difficulty in maintaining consistent sewing speeds. Additionally, rust or lint buildup can affect performance. The manual provides detailed troubleshooting guides to diagnose these issues, offering step-by-step solutions to restore optimal functionality. By addressing these common problems, users can extend the lifespan of their vintage Singer machines and ensure reliable operation for years to come. Proper identification and resolution of these issues are key to maintaining the machine’s efficiency and preserving its value for future use.
Thread Tension and Bobbin Issues
Thread tension and bobbin issues are among the most common challenges when working with old Singer sewing machines. Incorrect thread tension can lead to uneven stitches, fabric bunching, or even machine jamming. The manual provides clear instructions on how to adjust the tension discs and bobbin case to ensure smooth operation. Additionally, winding the bobbin correctly is crucial to prevent thread tangles and knots. Users are advised to use Singer-branded bobbins for compatibility and optimal performance. Regular cleaning of the bobbin area and tension springs is also recommended to maintain consistent stitch quality. By following the manual’s guidelines, sewists can resolve these issues effectively and achieve professional-looking results.
Adjusting the Presser Foot and Needle
Adjusting the presser foot and needle is essential for achieving precise stitching and ensuring smooth fabric movement. The presser foot should be raised or lowered depending on the fabric thickness and type. For thick fabrics or multiple layers, the two-step presser foot lifter allows for higher clearance, making it easier to position the material. The needle must also be properly aligned and secured to prevent misalignment or breakage. Regularly checking and tightening the needle clamp screw ensures stability during sewing. Additionally, using the correct Singer-branded needles is crucial for compatibility and optimal performance. Proper adjustment of these components not only enhances stitching quality but also reduces the risk of machine damage or fabric bunching. Always refer to the manual for specific guidance on adjusting these critical parts.
Maintenance and Care
Regular maintenance ensures optimal performance and longevity of your vintage Singer sewing machine. Clean and lubricate moving parts, replace worn components, and store the machine properly to preserve its functionality and value.
Cleaning and Lubricating the Machine
Cleaning and lubricating are essential for maintaining the performance and longevity of your old Singer sewing machine. Start by disconnecting the machine from the power source for safety. Use a soft, dry cloth to wipe away dust and debris from the exterior and accessible internal parts. For more thorough cleaning, remove the needle, presser foot, and bobbin case, and gently brush away lint and thread remnants. Lubricate moving parts, such as the handwheel and bobbin winder, with a few drops of sewing machine oil. Avoid over-lubrication, as it can attract dust and cause issues. Regular maintenance ensures smooth operation and prevents mechanical wear. Always use Singer-branded oil or a compatible alternative for optimal results. Cleaning and lubricating every 50 hours of use is recommended to keep your machine in excellent condition.
Replacing Parts and Accessories
Replacing parts and accessories on your old Singer sewing machine is crucial for maintaining its performance and functionality. Always use Singer-branded or compatible replacement parts to ensure proper fit and operation. Common parts that may need replacement include needles, presser feet, bobbins, and tension discs. These items are readily available in Singer sewing machine manuals or through authorized dealers. For vintage models, check online marketplaces or specialty sewing stores for authentic or reproduction parts. When replacing parts, refer to the manual for step-by-step instructions to avoid damaging the machine. Lubricate new moving parts with Singer sewing machine oil for smooth operation. Additionally, consider upgrading accessories like edge guides or darning plates to enhance your sewing experience. Regularly inspect and replace worn or damaged components to keep your machine running efficiently for years to come.
Proper Storage of the Sewing Machine
Proper storage of your old Singer sewing machine is essential to preserve its functionality and longevity. Before storing, clean the machine thoroughly to remove dust, lint, and oil residue. Use a soft cloth or brush to wipe down all surfaces. Cover the machine with a protective case or plastic bag to shield it from dust and moisture. Store it in a cool, dry place away from direct sunlight and extreme temperatures. Avoid leaving the machine in basements or attics where humidity levels may fluctuate. For added protection, place the machine in its original box or a sturdy container. Disconnect the power cord and foot control, and store them separately to prevent damage. For long-term storage, consider applying a light layer of rust-inhibiting oil to metal parts. Always consult the manual for specific storage recommendations tailored to your machine.
Advanced Features and Techniques
Explore advanced sewing techniques with the old Singer manual, including snap-in sewing tables, thick fabric handling, and customizable stitch patterns for enhanced creativity and precision in your projects.
Using the Snap-in Sewing Table
The snap-in sewing table is a versatile accessory designed to enhance your sewing experience. To install, keep the table horizontal and push it in the direction of the arrow until it clicks securely into place. The inside of the table can be used as an accessory box for storing small sewing tools. This feature provides additional workspace, making it ideal for handling larger projects or complex fabrics. For thick materials, the table offers stability and ease of movement, ensuring precise stitching. Proper alignment is crucial to avoid damage, so always follow the manual’s guidance for installation and removal. Regularly cleaning the table and ensuring it is free from debris will maintain optimal performance. By utilizing the snap-in sewing table, you can streamline your workflow and achieve professional-quality results with ease.
Sewing Thick Fabrics and Multiple Layers
Sewing thick fabrics and multiple layers requires careful preparation and adjustment of your Singer sewing machine. For heavy-duty tasks, use the two-step presser foot lifter to raise the presser foot higher, allowing easier placement of bulky materials. Ensure the fabric is aligned properly and move it smoothly under the needle to maintain even stitching. For especially dense fabrics, consider using a walking foot or Teflon foot to prevent dragging and ensure consistent feed. Adjust the thread tension as needed to accommodate the thickness of the fabric, and use a heavier-duty needle to prevent breakage. Always test-sew on a scrap piece to ensure settings are correct. Properly managing thick fabrics and layers will help you achieve professional results and extend the life of your machine.
Customizing Stitch Patterns and Lengths
Customizing stitch patterns and lengths on your Singer sewing machine allows for personalized creativity in your sewing projects. The manual provides detailed instructions on how to access various stitch options, adjust stitch length, and modify width settings to suit different fabrics and designs. For decorative stitching, you can choose from a range of patterns, while for utility sewing, straight and zigzag stitches can be optimized. Adjustments can be made using the stitch selector dial or electronic controls, depending on your machine model. Experimenting with these settings enables you to achieve precise results for both delicate and heavy-duty fabrics. Always test stitches on scrap fabric before working on your final project to ensure the desired outcome. This feature enhances versatility, making your Singer machine adaptable to a wide array of sewing needs.

History of Singer Sewing Machines
The Singer sewing machine has a rich history dating back to the 19th century, revolutionizing sewing and making it accessible worldwide. The old manual highlights its enduring legacy and evolution over time.
Evolution of Singer Sewing Machines Over the Years
The Singer sewing machine has undergone significant transformations since its inception in the 19th century. From manual treadle machines to electric and computerized models, Singer consistently innovated to meet changing demands. Early models like the Singer 201k were renowned for their durability and versatility, while later designs introduced advanced features such as automatic stitching and embroidery capabilities. The transition from mechanical to electronic systems marked a pivotal shift, enhancing efficiency and user experience. Over the years, Singer sewing machines have catered to both domestic and industrial needs, with models like the Heavy Duty and Quantum Stylist becoming favorites among sewists. Each evolution reflects Singer’s commitment to quality and adaptability, ensuring its machines remain relevant in an ever-evolving craft landscape.
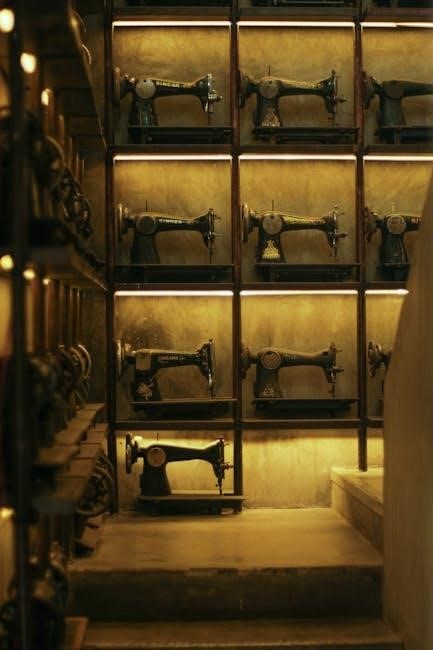
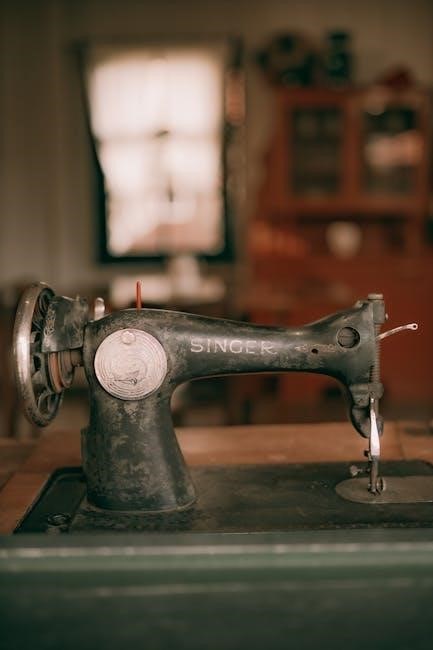
Vintage Singer Models and Their Significance
Vintage Singer sewing machines, such as the Singer 201K, 15-30, and 99K, hold a special place in sewing history. These models, produced in the early to mid-20th century, are celebrated for their robust construction and timeless functionality. The Singer 201K, introduced in the 1920s, became iconic for its smooth operation and versatility. The 15-30 model, known as the “Treadle Singer,” was a staple in many households, offering reliability for everyday sewing. The 99K, a portable electric machine, was popular for its compact design and ease of use. These vintage models are not only functional but also highly collectible, with enthusiasts appreciating their craftsmanship and historical value. Their manuals remain essential for maintenance and operation, ensuring these machines continue to inspire sewists and collectors alike.
Collectibility and Value of Old Singer Machines
Old Singer sewing machines have become highly sought after by collectors due to their historical significance and enduring quality. Models like the Singer 201K, 15-30, and 99K are particularly prized for their craftsmanship and nostalgic appeal. The value of these machines can vary widely, depending on factors such as condition, rarity, and original accessories. Restored machines with their original manuals and parts often command higher prices. Additionally, limited edition or special release models can fetch premium values in the collector’s market. The availability of vintage Singer manuals online has further fueled their collectibility, allowing enthusiasts to restore and maintain these machines effectively. As a result, old Singer sewing machines are not only functional but also cherished as pieces of history, making them valuable additions to any collection;
Downloading and Using the PDF Manual
Download the old Singer sewing machine manual PDF from reliable sources like ManualsDir.com for models such as Singer 201K and 99K. These manuals provide easy reference and printing options for convenience.
Finding Reliable Sources for the Manual
Finding reliable sources for the old Singer sewing machine manual PDF is essential for ensuring authenticity and completeness. Websites like ManualsDir.com and Singer’s official website offer free downloads for various models, including the Singer 201K and 99K. These platforms provide scanned versions of original manuals, often in PDF format, making them easy to access and print. Additionally, sewing communities and forums frequently share links to verified manuals. When downloading, ensure the source is trustworthy to avoid outdated or incorrect information. Some manuals may also be available through local libraries or vintage sewing machine dealers. Always verify the manual’s compatibility with your specific Singer model to ensure accuracy and usability.
Navigating the PDF Manual for Easy Reference
Navigating the old Singer sewing machine manual PDF is straightforward, thanks to its organized structure. The manual typically begins with a table of contents, allowing users to quickly locate specific sections such as “Setting Up the Machine” or “Troubleshooting Common Issues.” Key components like detailed diagrams, part lists, and step-by-step instructions are clearly labeled, making it easy to find information. Users can also use bookmarks or search functions in PDF viewers to jump to relevant pages instantly. Additionally, many manuals include an index for quick reference, ensuring that users can efficiently navigate the document without scrolling through all pages. This user-friendly design makes the manual a valuable tool for both beginners and experienced sewists working with vintage Singer machines.
Printing and Binding the Manual for Convenience
Printing and binding the old Singer sewing machine manual PDF offers a convenient way to access instructions offline. Users can print the document on high-quality paper for durability. Binding options like spiral or three-ring binders allow the manual to lie flat, making it easy to reference while working. Organizing the pages into sections with clear tabs or dividers can enhance navigation. Printing in color ensures that diagrams and illustrations are clear, while a durable cover protects the manual from wear. This physical copy provides a practical alternative to digital versions, ensuring that users can easily follow instructions without needing a screen. Properly binding the manual also preserves its structure, making it a lasting resource for sewing projects and machine maintenance.